Follow Me on Pinterest

Friday, August 10, 2012

Apple Scrapple

 A dense cinnamon, apple bread with a slightly crunchy brown sugar crumble on top.

Bread Ingredients:                                                    

2 granny smith apples  
1 1/2 cups milk                                             
2 1/4 teaspoons active dry yeast                               
2 1/2 cups flour                                                        
1 teaspoon salt
2 T. cinnamon
4 T. melted butter
4 T. sugar
1 egg
1 teaspoon vanilla

Topping Ingredients:

1/3 cup flour
1/3 cup butter
1/3 cup brown sugar


Directions:

  • Preheat oven to 350 degrees.
  • Cut apples into small chunks, then microwave for 3 minutes.
  • Dissolve yeast in lukewarm milk.
  • Combine flour, salt, sugar, cinnamon, vanilla, and egg in mixing bowl.
  • Pour milk and melted butter into flour mixture and mix until combined. 
  • Knead for about three minutes, then add apples and knead until apples are combined with dough.
  • Form dough into ball, put in lightly oiled bowl near oven (on stove top) and let rise 20 minutes.
  • Take the dough out of bowl, re-knead slightly, re-shape into ball and let rise 20 more minutes.
  • Again, take the dough out of bowl, re-knead slightly, re-shape into ball and let rise 20 more minutes
  • Combine ingredients for topping.  If butter is too hard, place near oven to soften.
  • Re-shape dough into a ball and place on a lined pan. Gently spread topping mixture across the top of the dough and make one large cut down the middle.
  • Bake for 25 minutes.  Rotate pan, cover with tinfoil, and bake for another 20 minutes (bake for approximately 45 total) 
  • Cool on rack for about an hour before serving. 


Flip it!

Add your favorite type of nut at the same time you knead in the apples!
Serve with butter or apple butter!
If not serving immediately, warm-up a slice in the microwave for 25-30 seconds!


Thursday, August 9, 2012

Cherry Apron

I saw this fabric and thought it was too cute so I wanted to find a project to use it for.  After going through some of my Pinterest boards I decided this was the perfect project!  The red fabric actually has little white polka dots but they didn't really show up in the picture.  My waist sash somehow ended up a little narrower than the one in the tutorial, I am not sure what I did differently, but it still works!


Flip it!

Use holiday fabric to make your baking more cheery!
Make a kid size apron with the extra fabric!
 

Wednesday, August 8, 2012

Ribbon Clothespin Clips

These are super easy to make!

Materials:

Clothespins
Ribbon
Mod Podge
Paint brush
Scissors
Ruler

Directions:

Measure the length of your clothespins and cut strips of ribbon that are just slightly longer.  Apply a thin layer of mod podge to one side of the clothespin.  Center the ribbon on the clothespin and apply mod podge over the top of the ribbon until it is completely covered.  Let the ribbon dry and then trim off the extra ribbon (it is easier to do this when dry rather than wet with mod podge or trying to cut the exact length of the clothespin).  Apply a small amount of mod podge to end of the ribbon where you cut to keep it from fraying. 

Flip it!

Add magnets to the backs and hang on the fridge!
Use to keep papers organized!
Hang along a ribbon or wire to hang Christmas or birthday cards!
Use pretty paper to cover the clothespins!

Tuesday, July 31, 2012

Necktie Tee

This is one of the easiest Pinterest projects I have made!  
It took me about 20 minutes total.  
And, as a bonus, I got the shirt and tie from Goodwill for less than $5 for both!
The only thing I changed from the tutorial is I chose not to add a button.


Saturday, July 28, 2012

Brownie Fluff

The brownie batter dip going around Pinterest looks amazing but of course me being me, I wanted to try to make a "healthier version."  I left in a few "unhealthy" ingredients because, let's face it, if it doesn't taste good its not worth any calories!  I haven't had the original version myself, but I think this one turned out pretty darn good!


Ingredients:

1- 8 oz. tub of fat free whipped topping
1- 8 oz. package of fat free cream cheese
2 cups powdered sugar
1/2 cup coco powder
chocolate chips for garnish (optional)

Directions:

Using a mixer, cream together the cream cheese and powdered sugar until well blended.  Add the tub of whipped topping and blend until fluffy, be sure to scrape the edges of the bowl to get all of the cream cheese and powdered sugar mixture.  Gradually add the coco powder until well blended.  Put in a serving dish and garnish with some chocolate chips if desired. 

Serve with strawberries, pineapple, apples, marshmallows, graham crackers, and anything else that tastes good chocolate covered!

Flip it!

For a even more chocolaty flavor, use chocolate flavored whipped topping!

Thursday, July 26, 2012

Chocolate Banana Milkshake

Great for when you are craving a milkshake 
but want to try to be a little healthier!


Ingredients:

1 frozen banana 
1 cup skim milk
1 scoop chocolate protein powder
4 large ice cubes
Blend all ingredients together until smooth, serve and enjoy!

I use Muscle Milk protein powder and I calculate this recipe to have:
345 calories
6 grams of fat
26 grams of protein  

Flip it!

Use any flavor of protein powder!
Add in extra servings of fruit!
Add plain yogurt for more creaminess!

Wednesday, July 25, 2012

Chocolate Raspberry Smoothie

Great for a post workout recovery drink or an on-the-go breakfast!


Ingredients:

1 scoop chocolate protein powder 
1 cup frozen raspberries
1 cup skim milk
1/3 cup fat free vanilla yogurt
4 large ice cubes

Blend together all ingredients until smooth (you may need to mix it around with a spoon once or twice).  Serve and enjoy!


Flip it!

Try it with strawberries!
Add a banana for potassium!
For a creamier smoothie, add more yogurt!

Wednesday, July 18, 2012

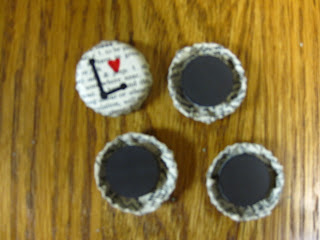
Bottle Cap Magnets

Bottle Cap Magnets

Materials

Bottle Caps
Dictionary Page(s)
Mod Podge (I used homemade; half water, half glue)
Mode Podge Clear Acrylic Sealer Spray
Paintbrush
Permanent Markers
Magnets
Pennies
 Hot Glue Gun

Rip a page out of an old dictionary.  (Or get one cheap at the dollar store.)  Cut 2 1/2" squares, being sure to get as much text in your square as you can.  I spray painted the caps but I will skip this step next time as I don't think it'll make a difference. 
Paint a thin coat of mod podge on the bottle cap, cover the top, sides, and bottom.  Place one square of your dictionary cut out on the bottle cap and begin covering in mod podge.  Gently fold/wrap the bottle cap with the paper, being sure to cover the entire surface with mod podge.
Let the mod podge dry completely, if you flip them over when one side is dry, they will dry more quickly.  When they are completely dry decorate each cap with permanent markers.  I like to doodle on a scrap paper first before I actually start drawing on the cap.
Once you have all the caps designed flip them over and use a hot glue gun to glue a penny inside each cap.  This will raise your magnet up so that it sticks just outside the cap so it can stick directly onto whatever you are putting it on.  You could also use a button, washer, or anything you can think of that would be small enough to fit in the cap and raise it up just slightly.  
 The magnets I used had adhesive already on them so I just peeled off the paper and stuck them to the pennies.  If yours aren't sticky, just use a glue gun.
Finally, take the magnets outside a spray the tops and sides with a light coat of Mod Podge Clear Acrylic Sealer.  This will protect the paper, your drawings, and give the magnets a little shine.
If you are giving the magnets as a gift you can glue dimes or washers onto a note card so the magnets will stick to the card.  I used Canadian pennies and dimes for this project since I have absolutely no use for them!
Flip it!
Make an alphabet set for kids!
Create letters to spell names!
Use any kind of fun paper you like!

Sunday, July 15, 2012

Ladybug Appetizer


Ladybug Appetizer


Ingredients (what I used to make 36)

Cucumber (1 1/2)
Cherry or Grape Tomatoes (36)
Black Olives (9)
Cream Cheese (6 oz.)
Sour Cream (6 oz.)
Ranch Seasoning Packet (1)
Food Coloring (red, blue, green)
Fresh Rosemary (1 sprig)

Directions

Mix cream cheese, sour cream, and ranch packet together (put a small about to the side; about 1 tablespoon).  Slice cucumbers in about quarter inch pieces.  (I didn't do this, but in the future I would lay them out on paper towel to blot out some of the water to make them less slippery!)  Arrange cucumber slices on a platter and put a generous dollop of dip on each one.  Slice tomatoes in half and arrange on top of the dip to look like the shell of your ladybug.  Slice the olives into quarters and arrange on dip to look like the head of the ladybug.  Take rosemary leaves (needles) and put two between the tomato and olive to look like antennae.  With small amount of dip you set aside, add food coloring until it is a dark brown or blackish color; put in the corner of a sandwich bag and snip a very tiny piece off the corner.  Gently pipe dots onto the tomatoes to look like the spots.  I garnished the plate with extra sprigs of rosemary.   

Flip it!

Use more cream cheese to make your dip thicker or more sour cream to make it softer!
Use crackers, pita chips, etc. instead of cucumber!
Use chives instead of rosemary for the antennae!
Use different color tomatoes to make other bugs!
Add fresh herbs to the dip instead of ranch seasoning!


Friday, July 13, 2012

Cesar Pasta Salad


Dressing Ingredients                           

1/2 box farfalle pasta (1/2 lb.)         
8 T light mayonnaise
2 T olive oil
1 t worcestershire sauce
1 t garlic powder
1 lemon juiced
1/4 cup Parmesan cheese
Salt & pepper to taste   
  

Salad Ingredients     

1 can quartered artichoke hearts
1 1/2 cups broccoli florets
1 1/2 cups grape tomatoes
1 cup black olives
1 cup chopped cucumber
1/4 cup diced red onion 

Dressing

Whisk together mayonnaise, olive oil, worchestershire suace, garlic powder, lemon juice, and parmesan cheese.  Add salt and pepper, if desired.


Salad

Cook pasta al dente and let cool.  Combine pasta, drained artichoke hearts, broccoli florets, grape tomatoes, black olives, cucumber, and red onion in a large bowl.  Pour prepared dressing over the top and toss until all ingredients are well coated.  Chill for 2 hours and enjoy!


Flip it!

Use pasta of your choice!
Add or deleted salad ingredients depending on what you like or have on hand!
To save time, use a store bought salad dressing!
If you like more pasta, add it!
If you like more veggies, add them!

Wednesday, July 11, 2012

Patriotic Skirt

Patriotic Skirt


I haven't sewn in a LONG time but I was inspired to by Pinterest to attempt this skirt.  It was super easy!  Instead of the sash on the skirt I decided to add a fabric flower instead.  I got sooooo many compliments on this skirt... definitely inspired to attempt future sewing projects!

Sunday, July 8, 2012

Birthday Candle Card


Birthday Candle Card


Materials

5- 3"x5" pieces of paper
5- 1" pieces of string
Blank white card
Scissors
White school glue
Marker or stamps


Directions

Along the inside of each piece of paper, glue a piece of string.  Be sure to leave a small piece overhanging for the "wick." Roll each piece of paper, starting at the end with the string, and working until the piece is entirely rolled.  Apply a thin line of glue along the inside of the paper to keep it rolled.  Once you have all of your "candles" ready, apply another thin line of glue along the paper seam and attach to your blank card.  Hand-write or stamp a message on your card.


Flip-it!

Make one BIG candle for a 1st birthday!
Make the number of candles equal to the age of the recipiant!
If you're not very crafty or to save time, just use real birthday candles!


Friday, July 6, 2012

Angelic Chocolate Berry Trifle


Angelic Chocolate Berry Trifle


Ingredients

1 box angel food cake mix
8 oz. Cool Whip
12 oz. chocolate chips
2- 1 lb. containers of fresh strawberries
2- 1 pint containers of fresh blueberries
Toothpicks


Directions

Bake angel food cake in a loaf style pan according the the package directions; let cool completely.  Meanwhile, thinly slice the strawberries and mix together with blueberries and chocolate chips.  Slice the cake into about 1" pieces then use a star shaped cookie cutter to make star shaped pieces of cake. Spoon a layer of the berry mix into the bottom of the bowl.  Lay star shaped pieces of cake along the side of the bowl.  Put a dollop of Cool Whip between each star and then spread a layer of cool whip on top of the berry mixture.  Add another layer of berry mixture and again put cake stars along the side of the bowl, put Cool Whip in between each star and on top of the berries.  Use remaining berry mixture to cover the top.  Put toothpicks into remaining cake stars and decorate the top. 


Flip it!

Use your favorite kind of cake!
Try it with Chocolate Cool Whip!
Mix in white chocolate chips!
Drizzle with chocolate sauce!
Use prepared cake to save time!


Thursday, July 5, 2012

Berry Chocolate Cones

Berry Chocolate Cones displayed in a spice jar rack.

Berry Chocolate Cones


Ingredients

Sugar cones
Strawberries
Blueberries
Chocolate chips
Cool Whip

Directions

Thinly slice strawberries then mix together with blueberries and chocolate chips.  Spoon the mixture into each cone until just about full.  Cover with a dollop of Cool Whip, then sprinkle a few more berries and chocolate chips on top.  I also put a bite of angel food cake on top because I had some leftover from another recipe.

Flip it!

Use waffle cones!
Include raspberries and blackberries!
Add marshmallows!
Drizzle with chocolate syrup!


Tuesday, July 3, 2012

Colonial Cupcake Cones

Colonial Cupcake Cones

Ingredients & Materials

16 cake cones
1 box white cake mix
12 oz. diet 7up (one can)
2- 12 oz. tubs of white frosting
Red & Blue Pop Rocks
Red & Blue food coloring
16 Cupcake liners
Cupcake pan
3 Bowls
3 Spoons

I made 16 cones with these ingredients; you may have more/less depending on how much batter you put in each.


Tip: The cones are best eaten the day you make them.  When the cones are stored with the cake in them for too long, the cones get soft from the moisture in the cake.


Directions

Combine diet 7up with a box of white cake mix (don't add ingrediants listed on box).  Mix together until smooth.  Put about 1 1/4 cups of cake batter in three separate bowls (or an even amount of mix in each bowl).  Add red food coloring to one bowl and blue food coloring to another bowl until desired shades are achieved; leave the third bowl white. 
Line your pan with cupcake liners.  Place a dollop of blue cake batter in each liner.  (I used a heaping tablespoon of each color.)  Gently push the blue cake batter with a spoon until it reaches the edges of each liner.   Next, gently put a dollop of white cake batter on top of the blue cake batter.  Again, gently push the white cake batter until is reaches the edges of each liner; don't push down or it will mix with the blue, just lightly push to the sides.  Finally, put a dollop of red cake batter on top of the white and again gently push it until it reaches the liners.  Keep in mind that when all three colors are in the liner you want them to be about 2/3 full; mine that had less mix actually turned out a little better because the cake didn't rise over the sides of the cone.  Also, I wouldn't put the red and blue next to each other because if they do mix a little, you will end up with some purple cake.  Finally, gently put a cone on top of each cupcake.
Bake the cupcake cones at 350 for about 18 minutes (or until done; I stuck a toothpick gently on the side of the cone until it came out clean).  Make sure to periodically check the cupcakes to re-center the cones as they may shift slightly as the cake bakes.
Let the cupcake cones cool completly.  The liners will peel off more cleanly when they are cooled.  The liners actually look pretty cool! 

Frost each cupcake with plenty of frosting and then sprinkle each with blue and red Pop Rocks for an explosion in your mouth!  I cut one open so you could see what they look like inside
Flip It!
Make just the cupcake without the cone!
Make the cake batter different colors for different holidays!
Use sugar cones instead of cake cones!
Top cones with different fun candies!
Double the recipe because these are yummy!