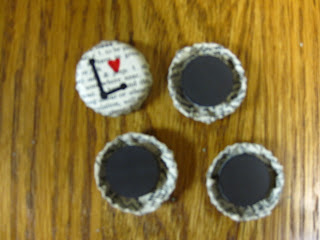
Bottle Cap Magnets
Materials
Bottle Caps
Dictionary Page(s)
Mod Podge (I used homemade; half water, half glue)
Mode Podge Clear Acrylic Sealer Spray
Paintbrush
Permanent Markers
Magnets
Pennies
Hot Glue Gun
Rip a page out of an old dictionary. (Or get one cheap at the dollar store.) Cut 2 1/2" squares, being sure to get as much text in your square as you can. I spray painted the caps but I will skip this step next time as I don't think it'll make a difference.
Paint a thin coat of mod podge on the bottle cap, cover the top, sides, and bottom. Place one square of your dictionary cut out on the bottle cap and begin covering in mod podge. Gently fold/wrap the bottle cap with the paper, being sure to cover the entire surface with mod podge.
Let the mod podge dry completely, if you flip them over when one side is dry, they will dry more quickly. When they are completely dry decorate each cap with permanent markers. I like to doodle on a scrap paper first before I actually start drawing on the cap.
Once you have all the caps designed flip them over and use a hot glue gun to glue a penny inside each cap. This will raise your magnet up so that it sticks just outside the cap so it can stick directly onto whatever you are putting it on. You could also use a button, washer, or anything you can think of that would be small enough to fit in the cap and raise it up just slightly.
The magnets I used had adhesive already on them so I just peeled off the paper and stuck them to the pennies. If yours aren't sticky, just use a glue gun.
Finally, take the magnets outside a spray the tops and sides with a light coat of Mod Podge Clear Acrylic Sealer. This will protect the paper, your drawings, and give the magnets a little shine.
If you are giving the magnets as a gift you can glue dimes or washers onto a note card so the magnets will stick to the card. I used Canadian pennies and dimes for this project since I have absolutely no use for them!
Flip it!
Make an alphabet set for kids!
Create letters to spell names!
Use any kind of fun paper you like!
Make an alphabet set for kids!
Create letters to spell names!
Use any kind of fun paper you like!


